
News

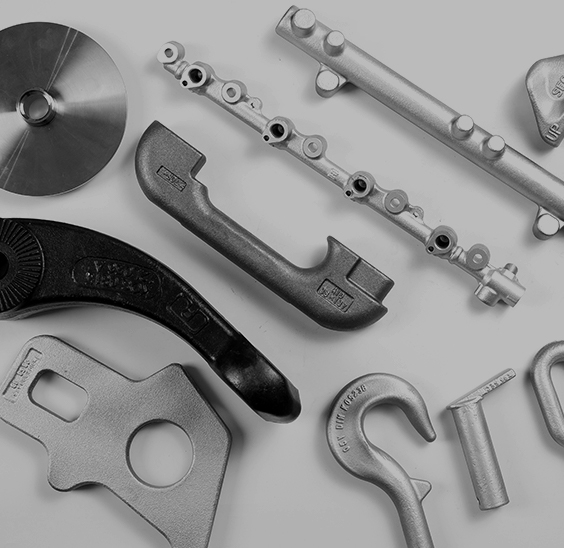
Forging Small Parts: Process Choices, Design Rules, and Tolerances
 2026.01.16
 Industry news
Content
- 1 Choose the Best Forging Process for Small Parts
- 2 Design Rules That Make Small-Part Forging Predictable
- 3 A Practical Process Flow for Forging Small Parts
- 4 Tolerances and Tooling Controls That Reduce Variability
- 5 Cost and Material Utilization: Where Forging Small Parts Wins
- 6 Quality Checklist for Production-Ready Small-Part Forging
Forging small parts is most reliable when you pick the right forging route (cold, warm, or hot/closed-die) and design the geometry for metal flow—then lock in tolerances, trimming, and inspection early. Done well, small-part forging delivers high strength, repeatable dimensions, and near-net shapes with minimal machining.
Choose the Best Forging Process for Small Parts
Small parts can be forged through several processes that trade off tooling cost, achievable tolerance, and material utilization. Start by matching your part family (fasteners, gears, pins, yokes, small levers, electrical contacts) to the process window and the finishing you can tolerate.
| Process | Best for | Typical dimensional capability | Notes for small parts |
|---|---|---|---|
| Cold heading / cold forming | Fasteners, rivets, pins, simple heads and shanks | Often ±0.05 mm or better on critical features (application-dependent) | Excellent for high volume; may still need secondary ops for bearing fits or threads |
| Cold forging (multi-station extrusion/heading) | Near-net small components needing strength and repeatability | Accuracy commonly reported in the ±0.01–±0.1 mm band (part-dependent) | High material efficiency; requires ductile materials and robust lubrication |
| Warm forging | Harder alloys or more complex shapes than pure cold forging allows | Between cold forging and hot forging, depending on heat and tooling | Often reduces press load and cracking risk versus cold forging |
| Hot closed-die forging | Tough alloys, thicker sections, or shapes needing strong grain flow | General closed-die tolerance is broader; trimming/coin can tighten results | Expect flash and scale; plan finish stock where machining is unavoidable |
| Powder forging | Near-net shapes where porosity control and tight geometry matter | Often cited around ±0.2 mm in examples (part-dependent) | Can cut machining; economics depend on powder cost and volume |
A quick rule to avoid the wrong process
- If the part is essentially a fastener-like geometry, start with cold heading/cold forming before you consider hot forging.
- If you need high strength plus near-net features (bosses, splines, short ribs), evaluate multi-station cold forging or warm forging.
- If the alloy is difficult to cold form (or the section changes are aggressive), closed-die hot forging with a planned coining/trimming step is typically safer.
Design Rules That Make Small-Part Forging Predictable
Most “forging small parts” issues trace back to geometry that traps material, forces sharp turns in flow, or demands unrealistic as-forged tolerances. The following rules reduce die wear, stabilize fill, and make trimming consistent.
Control draft, radii, and parting strategy
- Plan draft on walls that release from the die. For steel, draft is commonly cited in the 3–7° range, depending on depth and complexity.
- Avoid knife edges and sharp internal corners; use generous fillets to maintain flow and die life. For some stainless forging guidance, a 0.25 in (6.35 mm) fillet radius is treated as a minimum reference point for ease of flow.
- Place the parting line where it minimizes mismatch impact on functional features, and where flash trimming is accessible and repeatable.
Be explicit about what is “as-forged” vs “machined”
For small parts, it is rarely necessary (or economical) to chase ultra-tight fits everywhere. A practical approach is to label only the critical-to-function features as “finish required,” and let everything else stay as-forged.
- As-forged surfaces: ribs, bosses, and non-mating faces where near-net is acceptable.
- Finish-required surfaces: bearing bores, sealing faces, precision threads, and datum features that drive assembly stack-up.
Design a “flow-friendly” feature hierarchy
- Keep deep, thin ribs conservative; if you need them, consider multi-impression forging so each impression progressively builds height rather than forcing full fill in one hit.
- Prefer through-holes created by piercing after forging, or by secondary machining, rather than trying to form complex undercuts in the die.
- Where possible, align primary load paths with expected grain flow (one of forging’s core mechanical advantages).
A Practical Process Flow for Forging Small Parts
Below is a robust baseline flow you can adapt whether you are cold forging a fastener-like part or hot forging a small lever/yoke. The key is to treat trimming, sizing/coining, and inspection as part of the main process—not as afterthoughts.
- Define critical-to-quality dimensions (CTQs), datums, and acceptable as-forged surfaces.
- Select forging route (cold/warm/hot) based on CTQs, alloy formability, and volume.
- Create preform strategy (especially for hot forging): distribute volume so final impression fills without excessive flash.
- Design dies with draft, radii, and parting line for reliable release and trim access.
- Plan trimming and sizing/coining operations; reserve them for features that must be tight.
- Specify heat treatment (if needed) and surface finishing (e.g., plating, coating) after dimensional stabilization.
- Set an inspection plan: first-article, in-process checks, and final sampling tied to CTQs.
Tip: For high-volume forging small parts, spend more effort on early die trials and measurement loops than on post-process sorting—prevention is cheaper than detection.
Tolerances and Tooling Controls That Reduce Variability
Dimensional scatter in forged small parts usually comes from die closure variation, die wear, temperature swing (hot/warm forging), lubrication inconsistency (cold/warm), and trimming variation. You can directly mitigate these with a few proven controls.
Use coining/sizing when thickness matters
If thickness across the parting line is a CTQ, plan a coining/sizing step. One forging guideline notes typical closure tolerance around ±0.030 in, with ±0.010 in achievable using a post-forging coining operation (and even tighter in special cases). This is a common pattern: you do not “wish” hot forging into tight thickness—you size it.
Plan wear and trimming like they are part features
- Add explicit trim allowances so that flash removal does not encroach on functional geometry.
- Define a die-wear compensation strategy: acceptable wear limits, re-polish intervals, and a measurement trigger to re-cut inserts.
- Where tight edges are needed, consider secondary shearing or light machining rather than forcing the forging die to “hold” a sharp edge for long runs.
Keep temperature and lubrication inside a narrow band
In warm/hot forging, tighter temperature control reduces fill variation and scaling; in cold forging, lubricant consistency reduces friction spikes that drive dimensional scatter and tool breakage. For small parts, small swings can have outsized effects because feature volumes are small relative to total part volume.
Cost and Material Utilization: Where Forging Small Parts Wins
Forging is often chosen for small parts because it can reduce scrap and machining time while improving strength. Cold forging references commonly cite material utilization approaching near-100% in favorable geometries, and broader cold forging discussions often cite 85–95% utilization ranges depending on part family and process setup.
A simple numeric example (why near-net matters)
Assume a small steel part uses 40 g of finished material.
- Machining from bar at 60% utilization consumes about 66.7 g of stock (40 g / 0.60), creating 26.7 g of scrap per part.
- Cold forging at 95% utilization consumes about 42.1 g of stock (40 g / 0.95), creating 2.1 g of scrap per part.
- At 100,000 parts/year, that difference is roughly 2.46 metric tons less scrap (26.7 g − 2.1 g = 24.6 g saved per part).
This is why forging small parts is especially compelling at volume: the material delta compounds quickly, and machining hours drop when the part is near-net.
When forging may not be the best cost choice
- Very low volumes where die cost cannot be amortized.
- Geometries dominated by deep undercuts or complex internal cavities (often better suited to machining, MIM, or casting).
- Ultra-precision fits everywhere, where you will machine most surfaces regardless.
Quality Checklist for Production-Ready Small-Part Forging
Use this checklist to stabilize quality before you scale. It is designed to catch the most common pitfalls in forging small parts: uncontrolled variation, unclear CTQs, and late-stage tolerance surprises.
Before cutting final tooling
- CTQs defined with datums and gage method; non-CTQ surfaces explicitly allowed to be as-forged.
- Draft and fillet strategy reviewed; parting line and trim access confirmed.
- Material spec includes formability considerations for the intended forging route.
During trials
- Measure closure/mismatch and major CTQs across multiple hits, not just a single sample.
- Confirm trimming repeatability; check for burrs/rollover that could affect assembly.
- If thickness/flatness drives function, validate coining/sizing performance early.
In production
- Define a wear limit and rework trigger for dies; do not wait for customer escapes to correct drift.
- Use in-process checks tied to CTQs (not just visual inspection), and keep a simple reaction plan when values trend.
- Separate “as-forged acceptable” bins from “finish required” bins to avoid unnecessary rework.
Bottom line: forging small parts succeeds when design-for-forging (draft, radii, parting, trim) is treated as part of engineering, and when sizing/coining and inspection are used strategically to control CTQs without over-machining the entire component.


Our products primarily involve the production of forged components for the automotive industry, construction machinery industry, industrial instrumentation industry, and fluid equipment industry. Custom forging parts manufacturers and forged components solution providers in China.
Product links
Contact Us
-
Address:No. 5 Junrong Road, Daitou Town, Liyang City, Jiangsu Province, China
-
Tel:+86-18021979887
